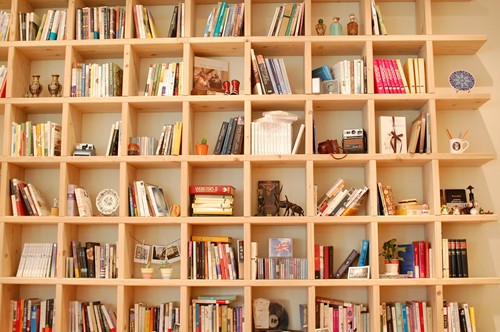
In the modern home, nothing combines practicality and style like a cubby bookshelf. Children can keep books or toys organized. They set the perfect backdrop for a display of photos, figurines, delicate dishes or other collectibles.
And if you size them right, just add some baskets to turn some of your shelves into drawers. Here's how to create a cubby bookshelf from scratch.
Plan your Shelves
There's no reason to recreate the wheel. You can find precise diagrams online that help you understand what you're going for. You can then adapt these plans to fit your space.
For our guide, we'll create nine same size cubes each one x one x one foot. But if your skill is more advanced, you might choose the alternate larger and smaller cubbies both to fit different types of items and because it adds visual appeal.
Gather Supplies
You'll need:
- A-1 red oak plywood (One 3/4" 4' X 8') - This product is more expensive. But it's high-quality. It comes in many hardwood shades. You may need to go to a lumber yard to find A-1 red oak plywood, but it's worth it. Alternatively, you can use 3/4 pine and treat it.
- 1/4" plywood for the back
- Banding veneers (around 25 ft)
- Clamps
- Pocket hole screws
- Wood plugs that match
- Wood glue
- Tung oil
- Drill
- Table saw - a manual saw could work. But you'll need a lot of elbows grease to accomplish it. *Pro tip* Check around with friends to see if you can borrow before buying a table saw for this one project.
- Eye/Ear protection when using power tools
Measure & Cut your A-1 Plywood
Measure and mark lightly with a pencil. This mark is on the cut line, so it shouldn't be seen on the finished product. You need:
- A top 1'X3'
- A bottom 1'X3'
- Two sides 1'X 2'10.5"
- Three shelves 1'X 2' 10.5. Note that each shelf and the top need two dadoes (grooves) where you'll slide in the dividers
- Six dividers 1' X varies. This depends on the depth of your grooves
Coat each piece with two to three coats of tung oil for extra luster. And let it dry completely, eight hours between coats.
Piece the Shelf Together
Take your time. Glue and clamp one side at a time minus the dividers. Get some help if needed. It can be tricky. Let the glue dry before drilling and inserting screws for more permanent stabilization.
Now the dividers should slide right in. Use wood plugs to cover up your hardware.
Add Finishing Touches
Attaching band veneers on cut edges gives the shelf a professional, finished look that many DIY projects lack. Generally, you'll simply iron these on carefully. Add the back and secure your shelf to studs. Cubby bookshelves will look like a jungle gym to some children, so take this precaution if children ever visit.
And that's how to create a cubby bookshelf. For more fun and DIY-friendly home projects, follow our blog.
About the Author

Vivian Serralta
"Delivering the Very Best in All Aspects of Real Estate, Because you Deserve No Less”
